Pages

Showing posts with label Snack. Show all posts

Chunky Monkey Chocolate Cookies (21 Day Fix APPROVED)


Holy DECADENT -- okay maybe that's the 21 day fix sugar ITCH talking, but these cookies are TASTY! I snagged the recipe from one of the coaches on my Beachbody team & whipped them up right away. Modify to make them unique to you or try them as is. Let me know what you think!! And good luck only eating one or two..

Ingredients:
2 scoops chocolate Shakeology
1 Banana
1/4 c Oats
1.4 c Chia/Flax/Coconut Seed (blend)
1 tbsp. Peanut Butter
1.4 c Dark Chocolate Chips

Mix until THICK batter is blended together. Drop on baking sheet and cook 7-10 minutes at 350 degrees. You're welcome! 

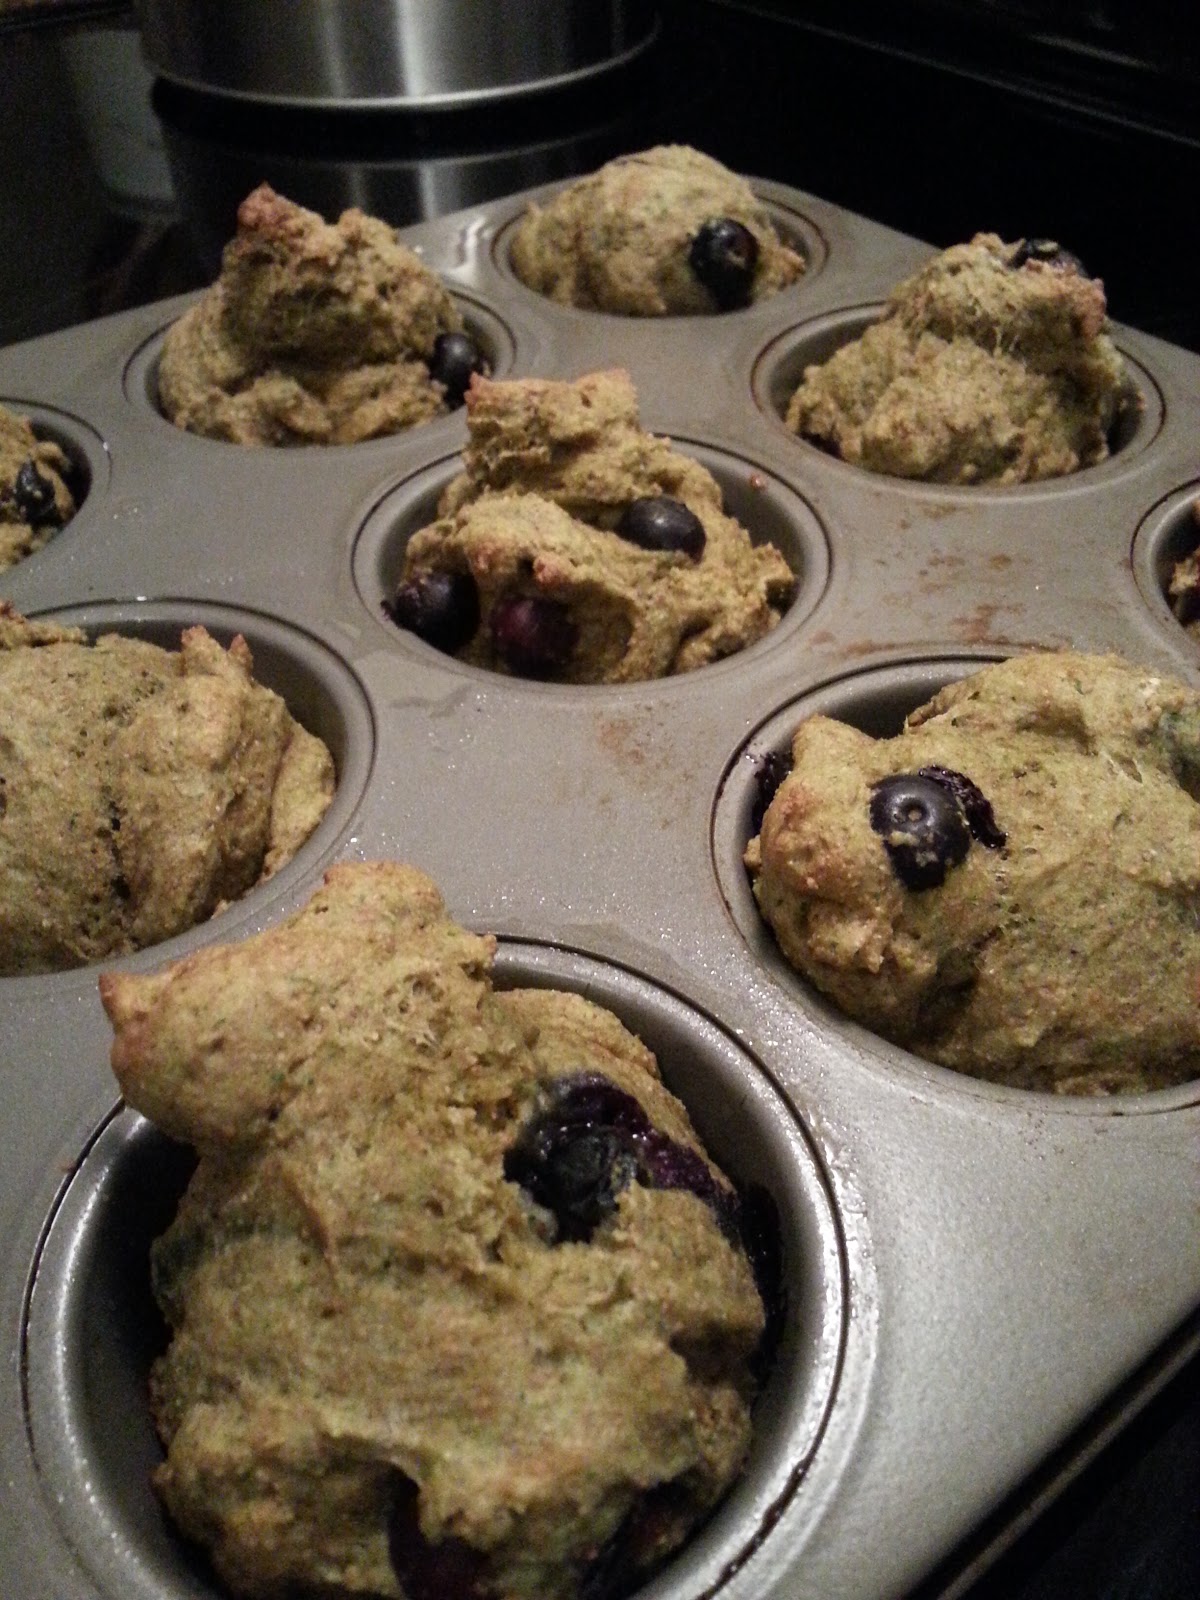
Blueberry Spinach Muffins

I'm always on the hunt for healthy, no-guilt treat recipes that are easy to whip up, as I am by NO means a baker. Tonight, I was paroozing pinterest, while standing hungrily in my kitchen post-workout, & found my inspiration for this recipe.


{recipe found here, but my recipe includes adaptations}

My Ingredients:

1.5 C Whole Wheat Flour
2 Tablespoons + 2 Teaspoons of Truvia
1.2 C Unsweetened Applesauce
"Palm-ful" of Fresh Blueberries
1 Large Egg
1 Teaspoon Vanilla Extract
1 C Fresh Spinach
2 Tablespoons of Coconut Oil
1 Teaspoon Baking Powder
1/2 Teaspoon Baking Soda
Dash of Salt

[[I also ended up using a splash of unsweetened almond milk]]


Directions:

1. Turn on your favorite iTunes station or the latest episode of The Bachelorette.

... THEN, Pre-heat oven to 350° F :)

2. Combine Truvia, Egg, Applesauce, Vanilla Extract, Oil & Spinach in a blender or food processor and give it a whirl! Pour blended spinach liquid into a large mixing bowl.


3. In a separate bowl, combine flour, baking soda, baking powder & salt.

4. Mix the wet & dry ingredients together with a spatula- the duo will form a thick dough.


**To loosen mine up a bit, so I could fold in my blueberries, I added a splash of unsweetened almond milk.

5. Fold in said blueberries


6. Spoon dough into a greased muffin tin & place in over for 15-18 minutes.

7. Eat a muffin IMMEDIATELY after baking (just kidding, watch out for burning your mouth!). Then, portion the rest of the muffins into baggies so you can freeze or refrigerate the perfect amount.


**This recipe makes about 9-10 large muffins**


If your sweet tooth is super cray-cray & you need to take these bad boys to the next level, try drizzling a small amount of honey or agave while hot!

Give this recipe a try and let me know what you think.

Bon Appetit
xo


Blueberry Banana Bread Muffins


With my mom and youngest sister coming to town in a few days (YAY!), I decided to make a few things ahead of time.. as we usually keep busy doing things like bike rides, card games & playing with the pups.

I started paroozing for a healthy banana bread recipe, but the last few I've tried have been BAD.. with mushy/gooey insides. YUCK! I found this one through allrecipes.com and only made a couple of small changes that turned out great. Oh and I prefer muffins over bread loaves, so I switched that up too. Next time, I will find a substitution for the brown sugar!

Ingredients:

2 c. of flour (I used 1 cup of whole wheat & 1 cup of gluten free all-purpose)
1 tsp. baking soda
3/4 c. brown sugar
1/4 tsp. salt (I used himalayan salt)
1/4 c. butter (I used 1/4 c. unsweetened applesauce)
1/8 c. non-fat greek yogurt (I used 0% greek)
2 eggs
2 1/3 c. mashed bananas
2 palmfuls of blueberries (yep, palmfuls)
cinnamon
coconut oil cooking spray


Directions: 

- Preheat oven to 350 degrees and spray muffin tins
-Combine flour, baking soda, cinnamon & salt in a large bowl
-Beat butter (or applesauce), yogurt, & brown sugar with an electric mixer in a large bowl until smooth
-Add eggs one at a time and beat until smooth
-Stir in mashed bananas until well blended
-Pour banana mixture to flour mixture; stir until moist
-fold in blueberries
-pour batter into muffin tins
-bake for 20 minutes or until tops are golden & muffins are baked through.. let cool before storing!

*you can opt to make this in a 9x5 bread pan, but you will need to bake it for about an hour*

This recipe was adapted from:: http://allrecipes.com/recipe/healthier-banana-banana-bread/


Try this recipe and let me know what you think.. I accidentally ate 2 already! Time to go burn those carbs off.. Enjoy!

{healthy} peanut butter cups


If you're anything like me, the demands of the sweet tooth can strike at any time. My weaknesses, to name a few, include chocolate and salt. I can pretty much forget about self-discipline if either of those are sitting in front of me. If I'm not following an abnormally stick meal plan for my current workout program, I try to keep a couple kinds of healthy treats around the house to avoid a grocery run of desperation for the candy, pop chip or frozen yogurt sections.

I saw online via gosh-darn pinterest that people had been making candies using chocolate shakeology. 

shut the front door!?

If you know me well at all, you are fully aware of how much I LOVE my chocolate shakeology! I saw the recipe and decided to kick it up a notch and add some peanut butter; I'd say this spark of creativity was purely to add protein to this little snack, but who doesn't love a good reeses cup?

Without further ado..

Ingredients:
1/4 c. Coconut Oil
1 scoop chocolate shakeology
2 tblsp. PB2 OR crunchy peanut butter
cooking spray (olive, vegetable or coconut)
*optional: sea salt to sprinkle on top*

Directions:

1. melt coconut oil in microwave


2. stir in chocolate shakeology


3. if using PB2, add now and stir. if using crunchy peanut butter, leave to the side.


4. spray muffin tin with cooking spray of choice


5. spoon mixture evenly into 6 muffin cups


6. if using crunchy peanut butter, you may spoon a small drop into the center of the chocolate mixture


7. finally, if using sea salt, sprinkle LIGHTLY on top

8. place muffin tin in freezer to allow candies to harden.


(notice here, I doubled my recipe to make candies with PB2 and peanut butter)


9. after about 30 minutes, use a knife to loosen the candies. Mine came out VERY easily and in one perfect little piece. 


Give these a try and let me know what you think!

For a tasty snack that contains legit nutrients from the shakeology & a little protein from the peanut butter, I could look past the texture for the "reeses-like" taste!

Enjoy,
Lindsey


My famous "Tannyn Balls"


When Nate and I started eating healthier in September of last year (like, lifestyle healthy), we decided that we needed a tasty little energy ball  that could be made once a week so we could grab & go. I found approximately a zillion recipes on pinterest and ended up creating my own version! This little nugget of goodness will appeal to your sweet tooth while packing a punch of energy and protein!


We named these little energy balls "Tannyn Balls" after our ever so active german short haired pointer named Tannyn. I'm pretty sure that if Nate and I had to choose two words to describe her that they would be: energetic and sweet. Naming these bites after her just seemed fitting.


Here's the recipe!
1 c. Oats
1/3 c. Agave (or honey, if you'd like)
2/3 c. Coconut Flakes
1/2 c. Peanut Butter
1/2 c. Dark Chocolate Chips
1/3 c. Flax Seed
2 tbsp. Black Chia Seed
1 tsp. Vanilla Extract
1/3 c. Dried Cranberries
1 scoop of Vanilla Protein Powder mixed with water to a "paste (optional)


My secret to keeping it easy and no-mess when making these bad boys is to use an ice-cream scoop and let them set on wax paper. Easy Peasy!!!

Enjoy!
xo, linz

Pomegranate "How To": The Bowl & Water Technique


Pomegranates are DELICIOUS & EXTREMELY healthy, packed full of dietary fibers, antioxidants, vitamins and minerals!


However, this super food isn't consumed as much as it should be & is often overlooked because of the prep work involved. It used to take me about 15+ minutes to break down ONE pomegranate- until my aunt taught me her "bowl and water technique" when I visited family for Christmas.


1) Remove the crown.


2) Score the skin, using the segments as a guide, from top to bottom. No need to cut all of the way through the fruit! 


3) Then, remove the center piece, connected to the stem, &  pry apart sections.


4) Break the seeds (arils) from the skins and membranes- the seeds will sink to the bottom, while the other pieces float to the top... keep the fruit submerged under water during this step to keep from the STAINING juices from going everywhere!


5) Bask in your sweet victory!

  
6) Strain and rise the arils (seeds). 


7) Pat dry with paper towel and store in the  fridge!


Time for some FACTOIDS::

-pomegranates can limit UV damage, help prevent arthritis and keep LDL, or bad cholesterol, from accumulating in arteries.

- too much fruit? the pomegranate arils can be frozen for up to three months. {{spread arils in a single layer on a parchment-lined baking sheet, and leave them in the freezer, uncovered, for about 2 hours. Then, transfer them to an airtight container or Ziploc baggie.

- no rush! ...Pomegranates do not continue to develop sugars after they’re harvested, so, once picked, they remain ripe. Keep them in your refrigerator and they are good to go for up to two months.

Check out this webpage for information on how the health benefits of pomegranates!

Paleo Treat: 'Back Country Clusters'

Today's recipe was a Pinterest find from the blog ourpaleolife.com. I myself am not on a strictly paleo diet, but like to incorporate some of these recipes into my regime every now and again.. Especially when chocolate is an ingredient!

Ingredients:
- 3 cups of a nut/seed/dried fruit mix (unsalted and no sugar added.. When in doubt, make your own)
- 1/2 cup honey
- 1/2 tsp. sea salt
- 1/2 tsp. cinnamon
- 1/2 cup dark chocolate chips (I used a smidge more)
- 1 tsp. vegan shortening (I used coconut oil)


Preheat oven to 350 and line a baking sheet with parchment paper (I used wax paper and learned my lesson.. NEVER again).

Combine all ingredients, EXCEPT shortening and chocolate chips, in a large bowl and stir until evenly coated.

Pour nut mixture onto lined baking sheet and press mixture flat until about 1/2" thick.

Baked for 20 minutes. Then let cool COMPLETELY.

Break nut mixture into bite-sized clusters.


Melt chocolate chips and shortening (coconut oil at casa de ghoens) for 30ish seconds.. Until you can stir it smooth.


Dip bottom of cluster into chocolate and set on sheet of parchment to harden.


I like to keep mine frozen or refrigerated!


--my experience of this recipe varies slightly from my instructions. My nut mixture didn't harden because the original recipe didn't mention that the shortening was to be used to melt the chocolate. That being said, my nut clusters remaining sticky instead of getting crunchy. I persevered and adapted by putting 1 inch spoonfuls of chocolate on the parchment paper first and the. Setting the sticky nut mixture on top. In the end, I acheived the same result but invested a little more time in the process.

Now I know for next time!

Bon appetit!

Xo,
Linz